
Set up payments
Connect Stripe or another provider, accept wire, check or invoice, take deposits, and sync with QuickBooks.
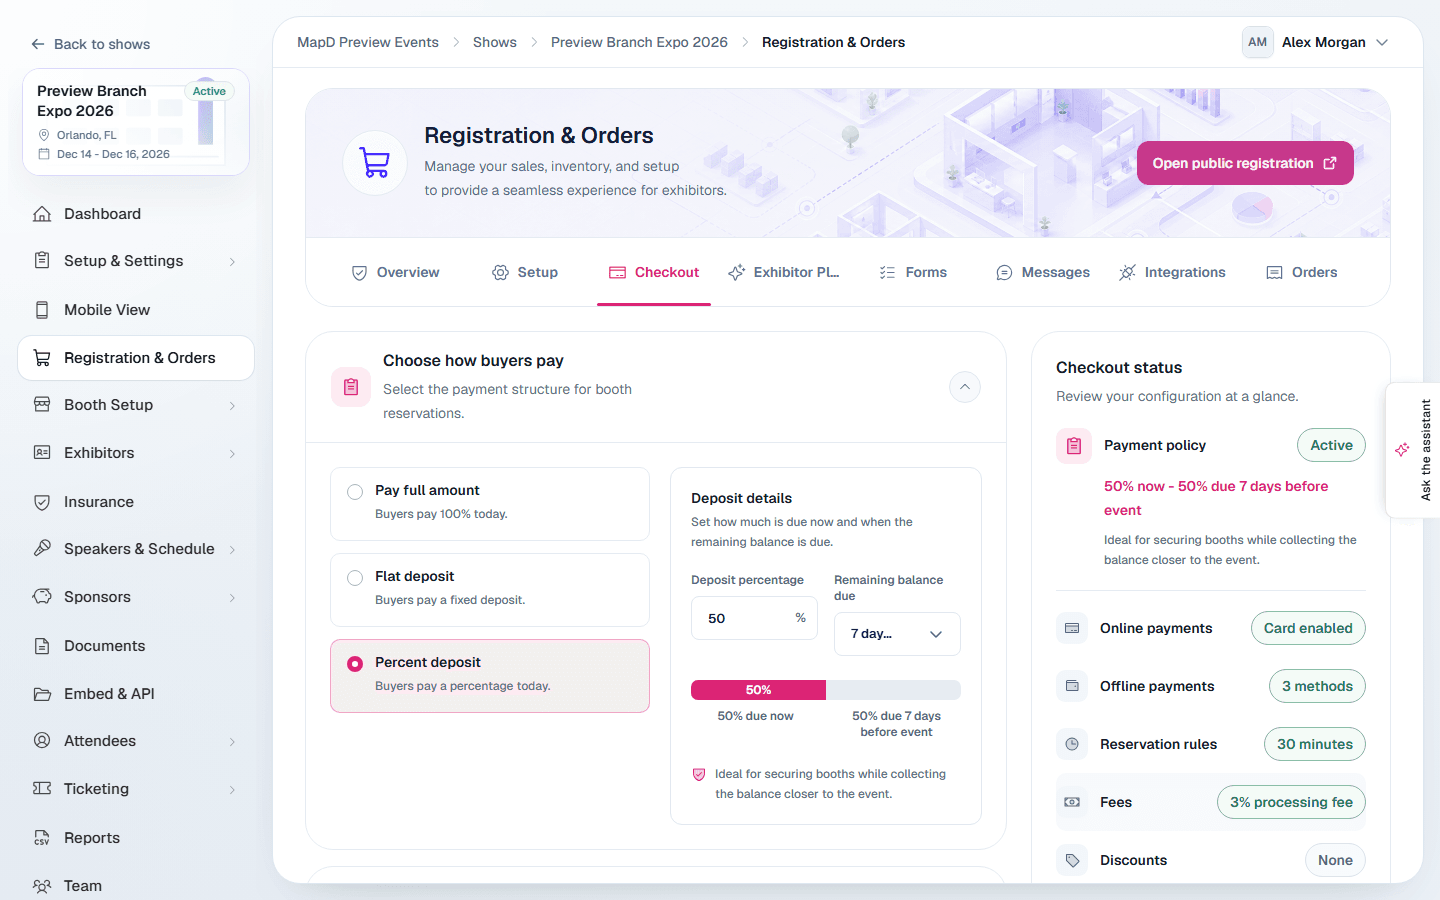
You decide how exhibitors pay: online by card or bank account, offline by wire, check or invoice, or a mix. All of this is on the Checkout tab of Registration & Orders.
Online payments
Card payments go straight to your own payment account. Turn on Online payments, choose a Provider and enter its credentials. Only one card provider can be active at a time.
Supported providers are Stripe, Authorize.Net, Moolah / NMI Gateway, BluePay, PayPal, Payflow Pro and QuickBooks Payments. ACH / eCheck via Authorize.Net has its own switch and can run alongside your card provider.
After entering credentials, select Save & test connection. Card checkout appears for buyers only when the provider shows Connected.
Stripe
Stripe needs three values from your Stripe dashboard. The Setup steps on the page walk you through each one:
- Publishable key
- Restricted key: a key starting with
rk_. Secret keys starting withsk_are refused, for your security. - Webhook signing secret: copy the Webhook endpoint shown on the page into Stripe, then paste the secret Stripe gives you.
Under Card collection, choose Stripe Checkout page (buyers pay on Stripe's hosted page, the default) or Card form on our checkout.
Authorize.Net
Authorize.Net and ACH / eCheck via Authorize.Net each need three values. In the Authorize.Net Merchant Interface they are under Account, Settings, Security Settings:
- API Login ID and Transaction key, from API Credentials & Keys. Creating a new transaction key there stops the old one working, so paste the new one into Map D straight away.
- Public client key, from Manage Public Client Key.
If you run cards and ACH through the same Authorize.Net account, enter the same three values for both.
Before you test the connection, check these in the Merchant Interface. The connection test reports each one and the provider stays off until it is fixed:
- Test Mode, under Account, Settings, must be off. An account in Test Mode records no payments.
- The Transaction Details API, under Account, Settings, must be on. Map D uses it to issue refunds, to check on a payment when Authorize.Net does not answer, and to find ACH payments the bank sends back.
- For ACH / eCheck via Authorize.Net, the account must have eCheck.Net enabled. This is an approval Authorize.Net gives the account, not a setting you can turn on yourself, so ask Authorize.Net for it.
If Authorize.Net does not answer while a buyer is paying, Map D checks whether the payment went through. When it can't tell, the buyer is asked not to pay again and the booth stays held. The order then needs a payment check: see Manage orders and payments.
If a buyer submits the same payment twice within two minutes, Authorize.Net refuses the second one. When the first one went through, Map D records it instead of charging again. Otherwise the buyer is asked to wait two minutes before trying the same payment details again.
Offline payments
Turn on the offline options you accept and write the instructions buyers see:
- Wire transfer: your bank details, and the button label.
- Check: where to mail it, and the button label.
- Invoice: the receipt text, and the button label.
With Direct purchase, offline orders are confirmed right away and show as awaiting payment until you record the payment on the order. With Manager approval, they wait for you to approve them first. See Manage orders and payments.
Deposits
Under Choose how buyers pay, pick Pay full amount, Flat deposit or Percent deposit. For deposits, set the amount and Remaining balance due: at checkout, or a number of days before the event.
Balance reminder emails exhibitors who paid a deposit a link to pay the rest before their balance is due. It is on by default, 7 days before the due date. Pick anywhere from 3 days before to 30 days before, or turn it off. Each order gets one reminder, and its activity on the order shows Balance reminder sent. Orders awaiting approval, canceled or archived orders, and orders on read-only shows get none. Checkout only promises a reminder while it is on.
Partial payments let exhibitors choose how much to pay online. Turn on At checkout, On the pay-your-balance page, or both, and set a Minimum amount (0 allows any amount). Exhibitors can pay anything from the minimum up to what they owe; when less than the minimum is left, they pay what is left. Offline methods such as check or wire are not affected.
Booth codes hides the price of booths that need a booth code. Exhibitors see the price once they enter the code and the booth is in their cart. See Keep a booth for an exhibitor.
QuickBooks
On the Checkout tab, select Connect to QuickBooks and sign in to your QuickBooks company in the pop-up. Allow pop-ups for Map D if nothing opens. Once connected, turn on Books sync and map your booths, services and sponsor levels to QuickBooks items, then select Save books sync.
If QuickBooks stops being authorized, a banner in the workspace asks you to reconnect. Online card payments through QuickBooks fail until you do.
Orders from your previous platform
Books sync never enters anything twice that your previous platform already put in QuickBooks:
- An order that already has a QuickBooks invoice keeps it as it is. New payments recorded in Map D are added to that invoice.
- Payments your previous platform already posted are never posted again.
- Orders with no QuickBooks invoice aren't posted. If you want them in QuickBooks too, turn on Also post orders from your previous platform below Books sync, then select Save books sync. Leave it off if you already entered them in QuickBooks yourself. The switch appears only when there are such orders.
If an order's invoice from your previous platform isn't in the connected QuickBooks company, nothing is posted and the order is listed for you to check. That usually means a different company is connected.
Still need help?
Contact your Map D account team. Include your show name and, if something looks wrong, a screenshot of the page.
Last updated October 1, 2026