
Manage orders and payments
Approve orders, record payments, send payment requests, create and edit orders, and export.
The Orders tab of Registration & Orders lists every booth order, with totals for sales, collections and open balances at the top.
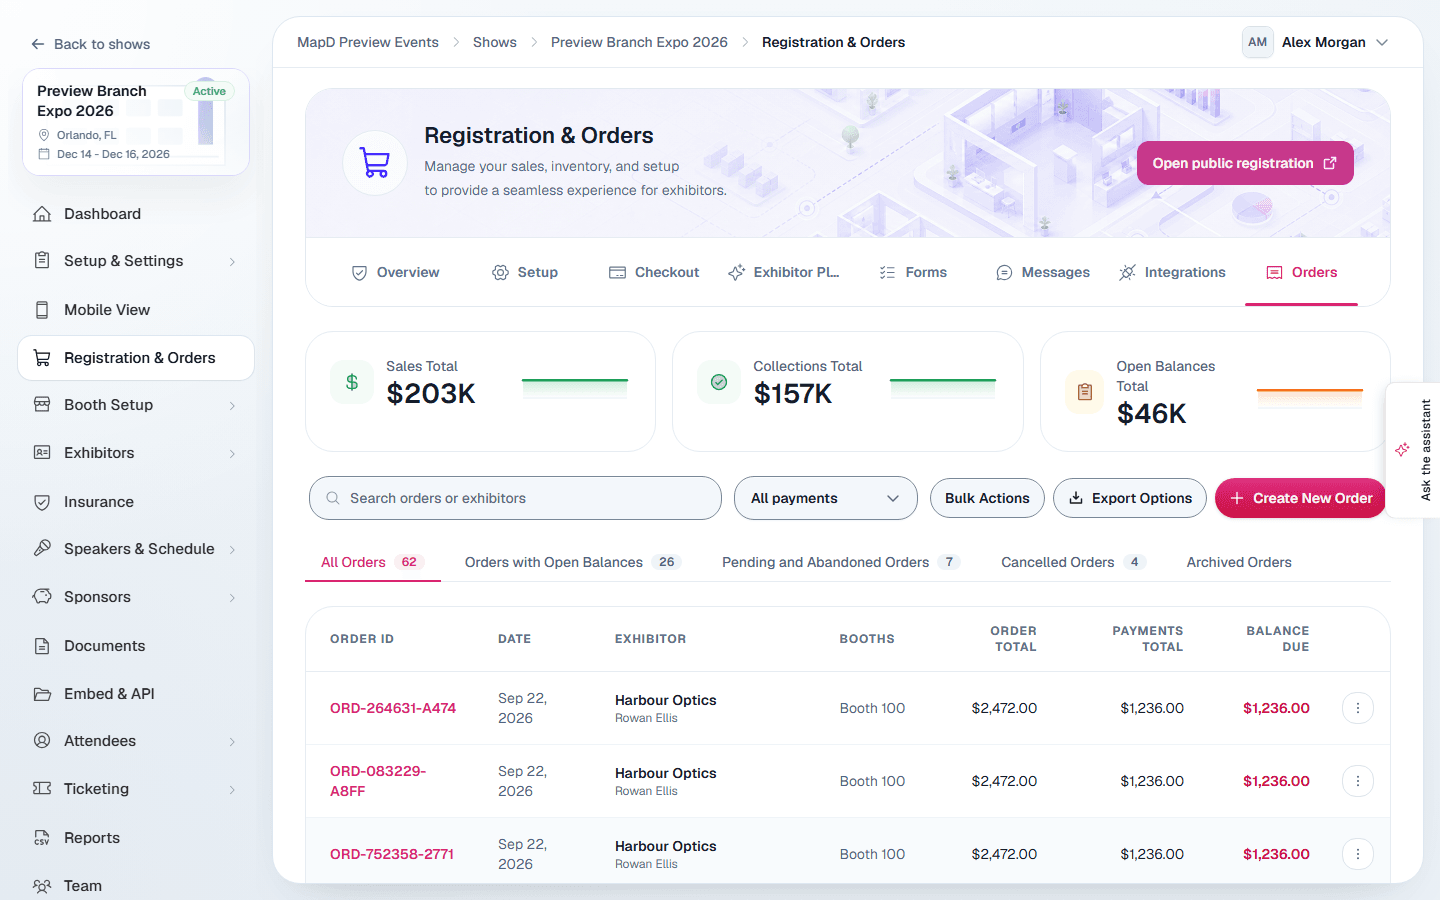
Find an order
Search by order or exhibitor, filter by payment status, or use the tabs: All Orders, Orders with Open Balances, Pending and Abandoned Orders, Cancelled Orders and Archived Orders.
The menu on each row has quick actions: view, edit, print the invoice, approve, release the booth, cancel or archive.
Approve an order
When sales use Manager approval, new orders wait for you. Open the order and select Approve assignment. The buyer's booth is confirmed and they can pay.
Record a payment
For check, wire or invoice payments:
Open the order and select Edit Order
Scroll to Order Payments.Add a payment row
Select Add payment row and enter the Date, Payment Method and Amount, plus an authorization code or memo if you have one.
Save
Select Save Changes. The balance owed updates.
Ask for payment
From an order's Send Payment Request or Pay Online section:
- Send Payment Request emails the buyer a link to pay their open balance, with an optional greeting.
- Copy Payment Link gives you the same link to share yourself.
- Enter Payment Online lets you take a card payment for the buyer.
To chase several balances at once, use Bulk Actions > Send Payment Requests. If your show moved from your previous platform, balances carried over from it are left out of that list, because most belong to past orders. Tick Include balances carried over from your previous platform to add them.
You can also Send Confirmation or Send Invoice again from the order page.
Create orders yourself
- Create New Order: pick the exhibitor and order date, then add booths and services on the edit screen.
- From the booth list: select booths on Booths & Services and choose Create order. You can email the buyer their confirmation right away.
- Bulk Actions > Bulk Create Orders: one order for each exhibitor who already has a booth assigned. No email is sent.
Change or cancel an order
Edit Order lets you change booths and services, add custom items, apply discount codes, write internal and customer memos, and record payments. Under Applied Discount, tick each code to apply. Some codes can't be combined with other codes (see Checkout rules, fees and discounts).
Cancel order releases the booths. If the order has payments, cancelling does not move money. To give money back, refund the payment as described below.
Refund a payment
Each payment under Payments on the order page has a Refund button while money is left to refund on it.
Select Refund on the payment
Enter the Amount to refund. It can be part or all of what is left on that payment.
Choose how
Refund through your payment provider sends the refund to the buyer's card or account. It is offered for online payments taken through Stripe, Authorize.Net, NMI, BluePay or QuickBooks Payments. Record a refund made outside Map D is for money you already returned, by check or in your provider's dashboard. Pick how it was refunded under Refunded by.
Confirm
The refund appears under Payments as its own line, and Paid, Balance Due and the payment status update. The order's activity shows Refund issued or Refund recorded.
A refund made in Stripe's dashboard is recorded on the order automatically when Stripe reports it. Refunds are not sent to QuickBooks: an order with a refund joins the books reconciliation list so you can record it there. Refunds can't be edited or removed from Edit Order, and a payment that has been refunded can't be deleted.
If Authorize.Net does not answer a refund, Map D checks with it before telling you anything. When it still can't tell whether the refund went through, the refund is not added to the order and the order needs a payment check (below). If the money did go back, use Record a refund made outside Map D rather than refunding again.
Read-only shows still take refunds.
Orders from your previous platform
If your show moved to Map D from your previous platform, its orders came with it, numbered L- and the number they had there (order 660950 is L-660950). Each keeps what it billed, what was paid and what is still owed.
- Activity History starts with the order's history from that platform, marked On your previous platform, including booths that were removed from it.
- If an order's booths were redrawn or repriced after it was placed, it has a line called Adjustment from your previous platform that keeps the total the exhibitor was billed.
- Files attached to registration answers open from the order page as before.
- An order whose exhibitor was deleted on your previous platform is kept under Deleted exhibitor (previous platform #…).
- Card payments taken through Authorize.net can be refunded with Refund through once the same Authorize.net account is connected under payment settings. Other payments from your previous platform (checks, PayPal and older Stripe payments) are refunded in the provider or by hand, then recorded with Refunded by.
Payments to check
Sometimes the payments recorded on an order stop matching the money:
- Online payment not confirmed or Refund not confirmed: a payment provider did not confirm what happened, so money may have moved without Map D recording it. This can happen to an Authorize.Net card or ACH payment, or to a refund. Map D never charges again on its own, and a booth the buyer may have paid for stays held.
- ACH payment returned by the bank: an ACH payment was approved, and later the exhibitor's bank sent it back, for example for insufficient funds or a closed account. Banks can return a payment days or weeks later. Map D checks every ACH payment from the last 60 days once a day. A returned payment no longer counts toward the order, so its balance goes back up. The booth is not released.
Each such order shows a banner on the Sales page, 1 order needs a payment check, with the amount and what to look for. The order page shows the same notice.
Look the payment up in your provider's account
In the Authorize.Net Merchant Interface, search for the invoice number or amount shown.
Record what went through
A payment that went through: on the order's notice, enter its transaction ID under Found it in Authorize.Net? Transaction ID and select Record this payment. Map D reads the payment from Authorize.Net and records it with the amount Authorize.Net took, so you can still refund it from Map D. It refuses a transaction for a different order, or one that took no money. This also closes the payment check, so skip the last step. A refund that went through: select Refund on the payment, then Record a refund made outside Map D. A returned ACH payment: nothing to record, Map D has already taken it off the order. Ask the exhibitor to pay the balance again, for example with Send Payment Request or Pay Online.
Select Mark payment checked
On the order, select Mark payment checked. The order leaves the banner, and its activity shows Payment check resolved.
Export
Export Options downloads orders, payments, services purchased and booths purchased as spreadsheets. Choose the columns you need, from contact details to registration answers.
Download every invoice at once
Bulk Invoice & Order Profile Export, at the bottom of Export Options, puts a PDF invoice and a PDF order profile for every order in one ZIP file. Carts and canceled orders are left out. The order profile shows what the order's page shows: the order information, the exhibitor, billing details, booths and services, totals, payments and registration answers. Internal notes and activity are not included.
Select Generate Invoices
The export covers the show's orders as they are when you ask. It is built in the background, so you can leave the page.
Wait for the email
You get an email when it is ready. The list under the button shows its progress, for example Building (40 of 120 orders), and then Ready.
Select Download ZIP
The download works only while you are signed in with access to the show's orders. A very large export is split into several ZIP files, each with its own Download part link.
A show builds one export at a time. The files are kept for 7 days and then deleted, and you can generate them again at any time. Exports work on read-only shows too.
Still need help?
Contact your Map D account team. Include your show name and, if something looks wrong, a screenshot of the page.
Last updated October 1, 2026